Bradford White Water Heater Manual: A Comprehensive Guide
Jody Scheckter’s 1979 championship with Ferrari, a unique feat for an African driver, mirrors the detailed guidance found within this manual for optimal performance.
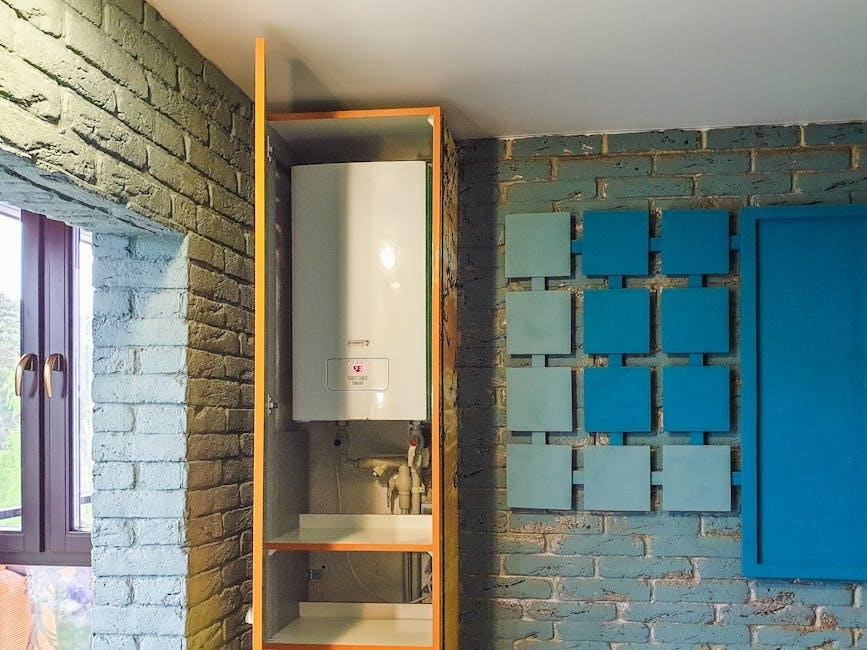
Understanding Your Bradford White Water Heater
Bradford White water heaters represent a commitment to quality and durability, much like Jody Scheckter’s focused ambition in Formula 1. This section details the core components of your unit, from the tank and burner assembly (gas models) to the heating elements and thermostat (electric models).
Understanding these parts is crucial for safe operation and effective troubleshooting. Like Scheckter’s early career navigating FF1600 and Formula Three, familiarizing yourself with your water heater’s basics builds a foundation for confident use. The manual outlines the function of the temperature and pressure relief valve, essential for safety, and the anode rod, vital for tank longevity.
Just as Scheckter overcame early setbacks, understanding your heater’s features allows you to maximize its lifespan and efficiency. This section provides a foundational knowledge base for all subsequent instructions, ensuring a smooth and informed ownership experience.

Safety First: Important Precautions
Jody Scheckter’s post-accident refocus mirrors the need for caution; always prioritize safety when installing, operating, or servicing your Bradford White water heater.

Gas Water Heater Safety
Like Jody Scheckter’s career turnaround after a significant incident, gas water heater safety demands unwavering attention. Always ensure adequate ventilation to prevent carbon monoxide buildup, a potentially fatal hazard. Regularly inspect the gas supply line for leaks using a soap solution – never a flame!
Before any service, shut off the gas supply at the main valve. Be mindful of the pilot light; follow the manufacturer’s instructions precisely for relighting. Never attempt to modify or repair gas components yourself; contact a qualified technician.
Ensure the flue pipe is properly connected and free of obstructions to vent exhaust gases safely. Rick Barry’s athletic prowess required careful preparation; similarly, your gas water heater needs diligent safety checks. Familiarize yourself with the smell of gas and know what to do in case of a leak – evacuate immediately and call the gas company.

Electric Water Heater Safety
Mirroring Jody Scheckter’s focused ambition, electrical safety with your water heater requires strict adherence to guidelines. Always disconnect power at the circuit breaker before performing any maintenance or inspection. Never work with electrical components while standing in water or on a damp surface.
Ensure the water heater is properly grounded to prevent electrical shock. Inspect wiring for damage or fraying, and replace any compromised components immediately. Like the World Superstars competition, electrical systems demand peak performance and safety.
Do not bypass any safety devices, such as the high-limit switch. If you notice any unusual smells, sounds, or sparks, immediately shut off the power and contact a qualified electrician. Remember Scheckter’s precision – electrical work requires expertise. A malfunctioning electrical water heater can pose a serious fire or shock hazard; prioritize safety above all else.
Installation Guide

Jody Scheckter’s rapid ascent in Formula Three parallels a swift, correct installation; meticulous preparation, following all local codes, ensures optimal, safe water heating performance.
Pre-Installation Checklist
Before beginning the installation of your Bradford White water heater, a thorough pre-installation checklist is crucial for safety and efficiency, much like Jody Scheckter’s pre-race preparations. First, verify local codes and obtain necessary permits. Confirm the correct voltage and gas supply are available, matching the heater’s specifications.
Ensure adequate clearance around the unit for servicing and ventilation, referencing the installation manual’s diagrams. Inspect the proposed installation location for structural integrity – the floor must support the heater’s filled weight. Gather all required tools and materials, including pipe wrenches, Teflon tape, and a level.
Verify the pressure relief valve is functioning correctly and has a discharge pipe extending to a safe location. Finally, familiarize yourself with the entire installation manual before commencing work, mirroring Scheckter’s study of the track. This proactive approach minimizes complications and ensures a successful installation.
Gas Water Heater Installation Steps
Similar to Jody Scheckter’s precise driving, gas water heater installation demands meticulous steps. Begin by connecting the gas supply line, using pipe dope approved for gas applications, and rigorously leak-testing all connections with soapy water. Next, install the vent pipe, ensuring proper slope and secure connections to prevent carbon monoxide buildup – a critical safety measure.
Connect the water inlet and outlet pipes, utilizing dielectric unions to prevent corrosion. Carefully follow the wiring diagram to connect the electrical supply for the control valve. Once connected, slowly turn on the gas supply and light the pilot light according to the manufacturer’s instructions.
Verify proper operation of the thermostat and safety controls. Finally, inspect for any gas or water leaks, and ensure adequate combustion air is available. Like Scheckter’s post-race analysis, a final check confirms a secure and efficient installation.
Electric Water Heater Installation Steps
Echoing Jody Scheckter’s focused approach, electric water heater installation requires precision. First, ensure the electrical circuit is appropriately sized and equipped with a dedicated breaker, matching the heater’s wattage. Connect the wiring according to the provided diagram, carefully observing color codes – black to black, white to white, and green or bare copper to ground.
Next, connect the water inlet and outlet pipes, again utilizing dielectric unions to prevent galvanic corrosion. Fill the tank completely with water before energizing the electrical circuit. This prevents damage to the heating elements. Once full, turn on the breaker and verify proper operation of the thermostat and heating elements.
Inspect all connections for tightness and ensure the unit is properly grounded. Like Scheckter’s meticulous car setup, a thorough check guarantees safe and efficient operation.

Operating Instructions
Similar to Jody Scheckter’s race strategy, consistent monitoring of your Bradford White heater ensures peak efficiency and longevity, delivering reliable hot water performance.
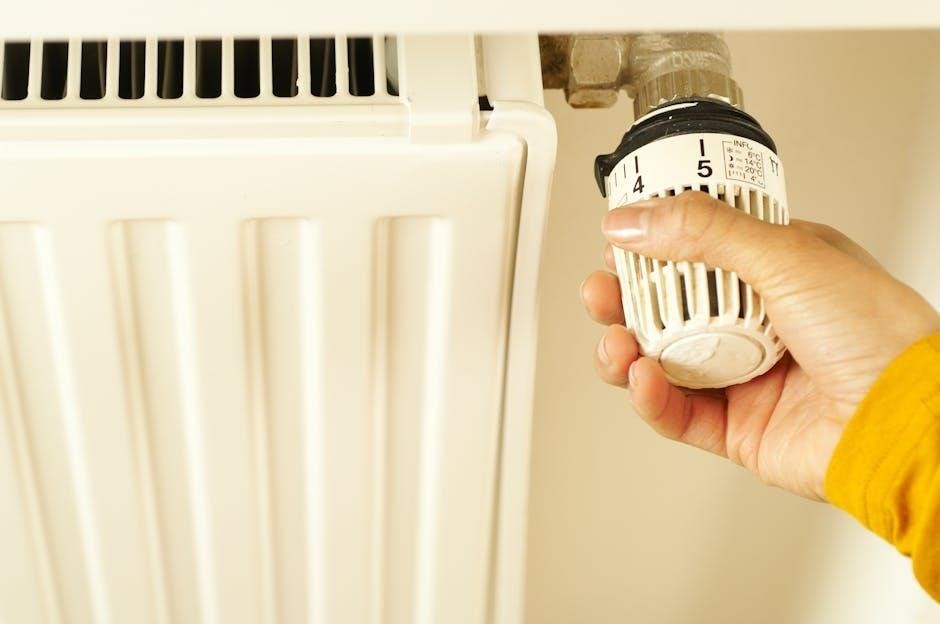
Thermostat Adjustment
Adjusting the thermostat on your Bradford White water heater is crucial for achieving your desired water temperature and optimizing energy consumption. Locate the thermostat access panel, typically behind a screw-on cover. Carefully remove the cover, and you’ll find the thermostat dial. Turning the dial clockwise increases the temperature, while counterclockwise decreases it.
Always use a calibrated thermometer to verify the actual water temperature at the faucet, as thermostat settings can vary. Bradford White recommends a maximum setting of 120°F (49°C) to prevent scalding and conserve energy. Remember, like Jody Scheckter fine-tuning his car, precise adjustments are key.
If you encounter difficulties or are unsure about the process, consult a qualified plumber. Incorrect thermostat adjustments can lead to inefficient operation or potential safety hazards. Regularly check the thermostat’s accuracy to ensure consistent performance and maintain optimal water heating efficiency. Prioritize safety and follow the manufacturer’s guidelines for best results.
Temperature Settings & Considerations
Bradford White water heaters offer adjustable temperature settings, typically ranging from 120°F to 140°F (49°C to 60°C). However, a setting of 120°F is generally recommended for household use, balancing comfort with energy efficiency and safety. Higher temperatures increase standby heat loss and the risk of scalding, particularly for children and the elderly.
Consider your household’s hot water demands when selecting a temperature. Larger families or those with frequent hot water usage may opt for a slightly higher setting, but always prioritize safety. Like Jody Scheckter adapting to track conditions, adjust settings based on need.
Be mindful of potential Legionella bacteria growth at lower temperatures. Periodically increasing the temperature to 140°F for a few hours can help mitigate this risk, followed by returning to the standard 120°F setting. Regular maintenance and proper insulation also contribute to efficient and safe operation. Always consult local plumbing codes and regulations.

Troubleshooting Common Issues
Jody Scheckter’s career involved overcoming challenges; similarly, this section guides you through resolving typical Bradford White water heater problems for reliable hot water.
No Hot Water – Gas Model
Similar to Jody Scheckter refocusing after early setbacks, diagnosing a gas water heater with no hot water requires a systematic approach. First, verify the gas supply is active and the unit isn’t locked out. Check the pilot light – if extinguished, follow the relighting instructions detailed in the ‘Operating Instructions’ section.
A faulty thermocouple is a common culprit, preventing gas flow to the burner. Inspect the burner for debris or obstructions hindering ignition. Examine the gas control valve; a malfunctioning valve won’t allow proper operation. If these checks don’t resolve the issue, the electronic gas control (EGC) may be defective, requiring professional attention.
Remember Scheckter’s determination? Apply that same persistence. Always prioritize safety – if you smell gas, immediately shut off the supply and contact a qualified technician. Do not attempt repairs beyond your expertise.
No Hot Water – Electric Model
Echoing Scheckter’s precision driving, troubleshooting an electric water heater lacking hot water demands a careful, step-by-step process. Begin by confirming power to the unit – check the circuit breaker hasn’t tripped. A tripped breaker is often the simplest fix, like a quick pit stop.
Next, inspect the high-limit switch, often a reset button. If it’s tripped, allow the unit to cool before resetting. Examine the heating elements; a burned-out element is a frequent cause. Use a multimeter to test for continuity – a lack of continuity indicates a faulty element. Also, verify thermostat settings are correct, as detailed in the ‘Operating Instructions’.
Like Scheckter’s focus, don’t overlook the basics. If issues persist, a professional electrician is recommended. Never attempt electrical repairs without proper training and safety precautions.
Leaking Water Heater
Similar to Scheckter’s need for a perfectly tuned machine, a leaking water heater signals a problem demanding immediate attention. First, shut off the water supply to the unit. Identify the leak’s source – connections, the tank itself, or the pressure relief valve.
Loose connections are often easily tightened, akin to a quick adjustment in the pit lane. However, a leak originating from the tank usually indicates corrosion and necessitates replacement. The temperature and pressure (T&P) relief valve may leak due to excessive pressure or a faulty valve; ensure the discharge pipe is correctly directed.
Just as Scheckter relied on his team, don’t hesitate to consult a qualified plumber. Ignoring a leak can lead to significant water damage and potential safety hazards. Regular inspections, as outlined in ‘Maintenance & Care’, can help prevent leaks.
Pilot Light Issues (Gas Models)
Echoing the precision required in Formula 1, a stable pilot light is crucial for gas water heater operation. If the pilot light won’t stay lit, first ensure the gas supply is on. A dirty pilot orifice can obstruct gas flow, similar to debris affecting a race car’s engine. Carefully clean it with a fine wire or specialized cleaning tool – never use a pin.
The thermocouple senses the pilot flame and signals the gas valve to open. A faulty thermocouple won’t detect the flame, shutting off the gas. Replacement is often necessary. Also, check the pilot assembly for damage or corrosion.
Like Scheckter’s focus, safety is paramount. If you smell gas, immediately shut off the gas supply and ventilate the area. If problems persist, contact a qualified technician; do not attempt repairs beyond your expertise.
Maintenance & Care
Jody Scheckter’s dedication to refining his racing skills parallels the need for consistent water heater maintenance, ensuring longevity and peak operational efficiency.
Annual Inspection Checklist
Mirroring Jody Scheckter’s meticulous preparation before each Formula 1 race, a yearly inspection of your Bradford White water heater is crucial for sustained performance and safety. Begin by visually examining the unit for any signs of corrosion, leaks, or physical damage. Check the temperature and pressure relief (T&P) valve for proper operation – a quick test involves briefly lifting the lever.
Inspect the burner assembly (gas models) for cleanliness and proper ignition. For electric models, verify the wiring connections are secure and free from corrosion. Flush the tank to remove sediment buildup, a process akin to maintaining a finely-tuned engine. Examine the anode rod; if significantly depleted, replacement is necessary to prevent tank corrosion. Finally, confirm the surrounding area is clear of flammable materials and that ventilation is adequate. Consistent adherence to this checklist will maximize your water heater’s lifespan and efficiency.
Sediment Flushing Procedure
Similar to Jody Scheckter’s dedication to optimizing his Formula 1 car, regular sediment flushing maintains your Bradford White water heater’s efficiency. First, shut off the power (electric) or gas supply. Connect a hose to the drain valve located near the tank’s bottom. Open the valve and allow the tank to drain completely – be cautious, as the water may be hot!
Once drained, briefly open the cold water inlet valve to stir up remaining sediment, then drain again. Repeat this process until the water runs clear. Close the drain valve and slowly refill the tank, allowing air to escape. Before restoring power or gas, bleed air from all hot water lines. This procedure, much like a pit stop, restores peak performance. Regular flushing prevents buildup, extending the heater’s life and reducing energy costs. Remember safety first – always follow manufacturer guidelines.
Anode Rod Replacement
Echoing Jody Scheckter’s meticulous attention to his racing machine, replacing the anode rod is crucial for protecting your Bradford White water heater’s tank. The anode rod sacrifices itself to corrosion, extending the tank’s lifespan. Locate the anode rod, typically under a hex head plug on top of the tank. Shut off the water supply and drain a few gallons to relieve pressure.
Using a socket wrench, carefully remove the old anode rod. It may be difficult if heavily corroded. Inspect the rod; if significantly depleted, replacement is vital. Apply Teflon tape to the threads of the new anode rod and install it securely. Refill the tank and check for leaks. This proactive maintenance, like a driver’s pre-race check, prevents costly tank failure. Replace the anode rod every few years, depending on water quality, ensuring long-lasting performance.

Warranty Information
Similar to Jody Scheckter’s championship validation, Bradford White warranties protect your investment, offering coverage against defects in materials and workmanship for specified periods.
Understanding Your Warranty
Just as Jody Scheckter secured his 1979 title through consistent performance, your Bradford White water heater’s longevity is supported by a comprehensive warranty. This isn’t merely a document; it’s a commitment to quality and customer satisfaction. The warranty period varies depending on the specific model and components. Typically, the tank itself carries the longest coverage, often a limited lifetime warranty against leaks resulting from corrosion.
However, parts and labor are usually covered for a defined period, such as five or ten years. It’s crucial to understand what’s covered – defects in materials and workmanship are standard, but damage due to improper installation, misuse, or lack of maintenance isn’t. Registration of your water heater is often required to activate the full warranty benefits, so retain your proof of purchase and complete the registration promptly. Carefully review the warranty document for specific terms, conditions, and exclusions to ensure you’re fully informed about your rights and responsibilities.
Warranty Claim Process
Mirroring Jody Scheckter’s focused approach to racing, initiating a warranty claim with Bradford White requires a systematic process. First, gather all relevant documentation: proof of purchase, model and serial number, and a detailed description of the issue. Contact Bradford White’s customer service department – their contact information is readily available in your manual and on their website.
A representative will guide you through the initial troubleshooting steps and may request photos or videos of the problem. If a claim is approved, Bradford White will typically authorize a qualified service technician to inspect the unit. They may choose to repair or replace the defective component, or the entire water heater, depending on the warranty terms and the nature of the issue. Keep detailed records of all communication and expenses related to the claim. Remember, adhering to the outlined procedures ensures a smooth and efficient resolution, just as a well-executed pit stop aided Scheckter’s success.