
Chamberlain Whisper Drive Plus Manual: A Comprehensive Guide
This manual provides detailed instructions, safety precautions, and troubleshooting tips for your Chamberlain Whisper Drive Plus garage door opener.
Carefully review all sections before installation or operation to ensure optimal performance and longevity of your system.
The Chamberlain Whisper Drive Plus represents a significant advancement in garage door opener technology, prioritizing quiet operation and reliable performance. This opener utilizes a belt-drive system, notably quieter than traditional chain-drive models, making it ideal for homes with living spaces above or near the garage.
Designed for convenience and security, the Whisper Drive Plus incorporates features like rolling code technology to prevent unauthorized access. Common issues reported by users include safety sensor misalignment and remote signal interference, often indicated by blinking lights. This manual aims to guide you through installation, programming, operation, and troubleshooting, ensuring a smooth experience.
Understanding the error codes, such as the 1-up/4-down sequence signaling sensor problems, is crucial for efficient maintenance. Whether you’re addressing a door that won’t open, close, or experiencing continuous beeping, this guide provides the necessary steps for resolution.
Understanding the Whisper Drive Plus Technology
The Chamberlain Whisper Drive Plus employs a robust belt-drive system, engineered for exceptionally quiet operation compared to chain-driven openers. This system minimizes vibrations and noise, enhancing the user experience. Central to its functionality is the rolling code technology, which dynamically changes the access code each time the remote is used, significantly bolstering security against potential unauthorized entry.
The opener’s intelligence extends to its safety features, including infrared safety sensors. These sensors prevent the door from closing on obstructions, ensuring the safety of people and objects. Diagnostic capabilities are also key; blinking lights serve as error codes, providing clues to potential issues like sensor misalignment or force setting problems.
Adjusting the close force is a vital aspect of this technology, allowing users to fine-tune the opener’s sensitivity. Regular maintenance, including belt tension checks and lubrication, is essential for sustained performance.
Safety Precautions and Warnings
Prior to installation and operation, carefully read and understand all safety precautions. Disconnect power to the garage door opener before performing any maintenance or repairs to prevent electrical shock. Never allow children to operate the garage door or play near the door while it is in motion.
Regularly test the safety reversing feature by placing an object in the door’s path. Ensure the safety sensors are properly aligned and free from obstructions; misalignment can compromise the safety system. Avoid adjusting the door’s balance as this can affect the opener’s performance and safety.
Never operate the garage door if the sensors are not functioning correctly. Be mindful of potential pinch points during operation. If continuous beeping occurs, immediately investigate and address the issue, as it indicates a problem with the safety system.

Installation and Setup
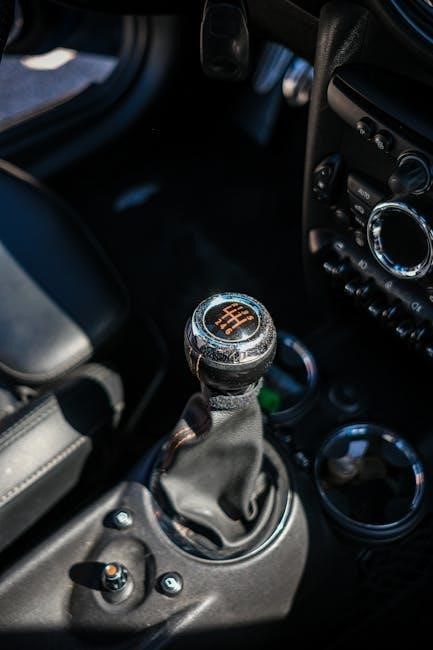
Proper installation is crucial for safe and reliable operation. This section details unboxing, mounting, bracket connection, and travel limit adjustments for your Chamberlain Whisper Drive Plus.
Unboxing and Component Checklist
Upon receiving your Chamberlain Whisper Drive Plus, carefully inspect the box for any signs of damage during shipping. Once confirmed, open the carton and verify all components are present before proceeding with installation. A complete package should include the garage door opener unit itself, a belt drive, a safety sensor set (two sensors), mounting brackets, a door bracket, an arm, a remote control(s), a wall control panel, hardware (bolts, nuts, washers), a user manual, and potentially a chain.
Compare the contents against the parts list detailed in this manual. Missing components should be reported to Chamberlain customer support immediately. Retain the original packaging for potential returns or warranty claims. Before beginning, familiarize yourself with each part’s function to streamline the installation process. Ensure you have the necessary tools readily available, such as a screwdriver, wrench, and ladder, for a smooth setup experience.
Mounting the Garage Door Opener
Begin by selecting a suitable mounting location in your garage, ensuring sufficient headroom and accessibility. The opener unit should be positioned centrally relative to the garage door, ideally on a sturdy ceiling joist or a properly installed support structure. Utilize the provided mounting brackets to securely attach the opener to the chosen location, ensuring they are firmly fastened with the included hardware.
Double-check the stability of the mounted opener before proceeding. Improper mounting can lead to vibrations and operational issues. Maintain a minimum distance of three feet from the door and any obstructions. Refer to the diagrams in this manual for precise bracket placement. Ensure the rail alignment is correct, as this is crucial for smooth door operation. Prioritize safety by using a stable ladder and seeking assistance if needed during this step.
Connecting the Door Bracket and Arm
Attach the door bracket securely to the top section of your garage door, centering it for balanced operation. Use the provided bolts and nuts, tightening them firmly to prevent slippage during operation. Next, connect the opener arm to both the door bracket and the trolley on the garage door opener rail. Ensure the arm is properly aligned and that all connection points are secure.
Verify that the arm’s length is appropriate for your door’s height and travel. Incorrect arm length can cause binding or insufficient door movement. Double-check all bolts and nuts for tightness after initial connection. A loose connection can lead to operational failures and potential safety hazards. Refer to the detailed diagrams for correct assembly and alignment, ensuring a smooth and reliable connection between the opener and the door.
Adjusting Travel Limits
Precisely adjusting the travel limits—both up and down—is crucial for safe and efficient garage door operation. Locate the adjustment screws on the garage door opener unit, typically marked “Up” and “Down.” Begin by setting the down travel limit to allow the door to fully close without excessive force. Then, adjust the up travel limit to ensure the door opens to the desired height, avoiding contact with the ceiling.
Test the limits incrementally, making small adjustments after each test. Observe the door’s movement carefully, and avoid over-tightening the screws. Incorrectly set limits can cause the door to reverse prematurely or fail to fully open or close. If the safety sensors are frequently triggered, re-evaluate the down travel limit. Refer to the manual’s diagrams for screw locations and recommended adjustment procedures.

Operation and Programming
This section details how to effectively use your Chamberlain Whisper Drive Plus, including remote control operation, programming additional remotes, and utilizing the wall control panel.
Using the Remote Control
Your Chamberlain Whisper Drive Plus garage door opener comes equipped with a convenient remote control for effortless operation. To open or close the garage door, simply press the corresponding button on the remote. Ensure a clear line of sight between the remote and the garage door opener’s receiver for optimal performance. If the remote isn’t functioning, first check the battery.
Replacing the batteries is a straightforward process, typically requiring a small screwdriver. Old or weak batteries are a common cause of remote control failure. If the issue persists after a battery change, try reprogramming the remote to the garage door opener. Interference from other devices can sometimes affect the remote’s signal, so minimizing obstructions and potential sources of interference is recommended. Regularly test the remote to confirm its functionality and ensure it’s always ready when you need it.

Programming Additional Remotes
To program additional remotes to your Chamberlain Whisper Drive Plus, begin by locating the “Learn” button on the garage door opener motor unit. This button is typically yellow or orange. Press and release the “Learn” button – an indicator light will illuminate. Within 30 seconds, press and hold the button on the new remote control you wish to program.
The garage door opener will attempt to recognize the remote’s signal. You’ll know programming is successful when the garage door opener’s lights flash, or the motor clicks. Repeat this process for each additional remote you want to add. If programming fails, ensure the remote is compatible and try again, keeping it within a reasonable distance of the motor unit. Refer to the full manual for specific model instructions.
Setting the Travel Limits
Adjusting travel limits ensures your Chamberlain Whisper Drive Plus opens and closes the garage door to your desired heights. Locate the UP and DOWN adjustment dials on the garage door opener motor unit. These dials control how far the door travels in each direction. Begin by loosening the screws on the dials.
Use a screwdriver to incrementally adjust the UP dial to set the fully open position, and the DOWN dial for the fully closed position. After each adjustment, test the door’s movement. Fine-tune the dials until the door reaches the desired limits without reversing prematurely. Once satisfied, firmly tighten the screws to secure the settings. Incorrectly set limits can cause the door to reverse or not fully close.
Utilizing the Wall Control Panel
The wall control panel provides a convenient, stationary method for operating your Chamberlain Whisper Drive Plus garage door. A single press of the “Open” or “Close” button initiates the corresponding door movement. The panel features a “Stop” button, immediately halting the door mid-travel.
If the door doesn’t respond, check the panel’s battery – a common issue. To test functionality, ensure a clear line of sight between the panel and the motor unit. Programming the panel typically involves pressing the “Learn” button on the motor unit, followed by pressing the desired button on the wall control. Refer to the programming section for detailed instructions. Regularly inspect the panel for damage and ensure buttons are responsive.

Troubleshooting Common Issues
This section addresses frequent problems with your Chamberlain Whisper Drive Plus, like doors failing to open or close, sensor misalignment, and remote control malfunctions.
Garage Door Not Opening
If your garage door isn’t opening, begin with the simplest checks first. Step one involves carefully cleaning the safety sensors located near the door tracks with a dry rag, ensuring they are free from obstructions like dust or debris. These sensors are crucial for safe operation.
Next, verify the remote control’s batteries are fresh. Old or weak batteries are a common culprit. If replacing the batteries doesn’t resolve the issue, consider potential signal interference. The Chamberlain Whisper Drive Plus can sometimes experience issues with remote signals.
Also, inspect the garage door opener’s wiring for any loose connections. A blinking yellow light often indicates a sensor problem or misalignment. Finally, ensure the door isn’t manually locked, preventing the opener from engaging. If problems persist, consult the error code section for further diagnostics.
Garage Door Not Closing
When your Chamberlain Whisper Drive Plus garage door fails to close, the most frequent cause is obstructed safety sensors. Carefully examine these sensors, ensuring nothing breaks the beam – even a small object can trigger the safety mechanism. Clean them thoroughly with a dry cloth.
Flashing lights on the garage door opener often signal a safety sensor issue. If the lights flash and the door doesn’t close, this is a strong indicator. Check the force settings; if set too low, the door may reverse prematurely. Adjust the close force dial slightly higher.
Inspect the wiring connections to ensure they are secure. A video demonstration shows how flashing lights indicate this problem. Finally, verify there are no obstructions in the door’s path. If the issue continues, consult the error code section of this manual for specific troubleshooting steps.
Safety Sensor Alignment Problems
Misaligned safety sensors are a common issue with the Chamberlain Whisper Drive Plus, preventing the door from closing. These sensors, located near the floor on either side of the door, create an invisible beam. If disrupted, the door will reverse or refuse to close as a safety precaution.
To diagnose, visually inspect the sensors to ensure they are facing each other directly. Confirm nothing obstructs the beam – even dust or cobwebs can interfere. The sensors typically have indicator lights; a blinking light suggests misalignment.
Carefully adjust the sensor brackets until the indicator lights are solid. If adjustment is difficult, ensure the sensors are securely mounted. A blinking yellow light often signifies this problem. Refer to the installation section for detailed alignment instructions. Proper alignment is crucial for safe and reliable operation.
Remote Control Not Working
If your Chamberlain Whisper Drive Plus remote isn’t functioning, several factors could be at play. The most common issue is depleted batteries; replace them with fresh ones, ensuring correct polarity. If new batteries don’t resolve the problem, the remote may need reprogramming to the garage door opener.
Check for interference from other devices operating on the same frequency. Fluorescent lights or other radio transmitters can sometimes disrupt the signal. Try operating the remote closer to the garage door opener to rule out range issues.
If the remote still fails, consult the programming section of this manual to re-establish the connection. Ensure no obstructions block the signal path. A faulty remote may require replacement; contact Chamberlain support for assistance.

Continuous Beeping Sounds
Continuous beeping from your Chamberlain Whisper Drive Plus typically indicates a safety sensor issue or a problem with the door’s travel limits. The opener emits this sound as a warning, preventing operation until the issue is resolved. First, meticulously inspect the safety sensors located near the garage door tracks.
Ensure they are aligned, clean, and free from obstructions. Even a slight misalignment can trigger the beeping. If the sensors appear correct, the problem might lie with the travel limits – the points at which the door automatically stops when opening or closing.
Refer to the ‘Setting the Travel Limits’ section of this manual to adjust these settings. If the beeping persists after these checks, consult the error code section to decipher the specific issue and seek further assistance.
Maintenance and Repair
Regular maintenance ensures the longevity of your Chamberlain Whisper Drive Plus. This includes belt tension checks, lubrication of moving parts, and battery replacements for optimal function.
Regular Maintenance Schedule
To maintain peak performance of your Chamberlain Whisper Drive Plus, a consistent maintenance schedule is crucial. Monthly, visually inspect the entire system for any signs of wear, damage, or loose components. Pay close attention to the belt, checking for fraying or cracks – replace if necessary. Lubricate all moving parts, including rollers, hinges, and the chain/belt drive, using a silicone-based lubricant; avoid oil-based products as they attract dust.
Every six months, thoroughly clean the safety sensor lenses with a dry rag to ensure proper operation. Annually, inspect the mounting hardware, tightening any loose bolts or screws. Check the belt tension and adjust as needed to prevent slippage. Finally, replace the remote control batteries proactively to avoid unexpected failures. Following this schedule will minimize potential issues and extend the lifespan of your garage door opener.
Belt Tension Adjustment
Maintaining proper belt tension is vital for the smooth and reliable operation of your Chamberlain Whisper Drive Plus. If the belt is too loose, it may slip, causing the door to operate slowly or not at all. Conversely, excessive tension can strain the motor and other components. To check tension, disengage the opener and manually lift the door halfway.
Observe the belt; it should have minimal slack, approximately ½ inch of deflection when pressed firmly. Most Whisper Drive Plus models feature an adjustment mechanism near the motor. Loosen the locking nuts, then use the adjustment bolt to increase or decrease tension. Retighten the nuts securely after achieving the correct tension. Regularly monitoring and adjusting the belt ensures optimal performance and prevents premature wear, contributing to a longer lifespan for your garage door opener system.
Lubrication of Moving Parts
Regular lubrication is crucial for maintaining the smooth operation and extending the lifespan of your Chamberlain Whisper Drive Plus garage door opener. Focus on key moving parts, including the chain or belt, rollers, and hinges of the door itself. Use a silicone-based lubricant specifically designed for garage door applications; avoid oil-based lubricants as they can attract dust and grime.
Apply a light coating to the belt or chain, ensuring even distribution. Lubricate the rollers by applying a small amount to each roller as you move the door manually. Similarly, lubricate the hinges. Avoid lubricating the tracks, as this can create a sticky surface. Perform this maintenance every six months, or more frequently in harsh environments, to ensure optimal performance and prevent unnecessary wear and tear on your system.
Replacing the Batteries in the Remote
Maintaining functional remote controls is essential for convenient garage door operation. When your Chamberlain Whisper Drive Plus remote stops responding, the first step is to replace the batteries. Typically, these remotes utilize a CR2032 battery, but always verify the correct type specified in your owner’s manual.
Carefully open the remote casing, usually by sliding or gently prying it open. Remove the old battery, noting its orientation (+/-). Insert the new battery with the correct polarity. Ensure the battery is securely seated. Close the remote casing, making sure it clicks shut. Test the remote by pressing a button; the garage door should respond. If it doesn’t, double-check the battery installation and consider reprogramming the remote.
Advanced Features and Settings
Explore customizable settings like close force adjustment, error code interpretation via blinking lights, vacation mode, and seamless smart home integration options.
Adjusting the Close Force
The close force setting determines how much power the Chamberlain Whisper Drive Plus uses to fully close the garage door. If the door reverses prematurely, indicating it doesn’t close completely, the close force might be set too low. Carefully adjust the close force dial, located on the opener unit, slightly higher.
Incremental adjustments are crucial; avoid large changes. Increase the force in small increments and test the door’s operation after each adjustment. Observe if the door now closes fully without reversing. Conversely, if the door slams shut, the close force is likely too high and needs reducing;
Prioritize safety during this process. Ensure the area is clear of obstructions and that the safety sensors are properly aligned. Never set the close force so high that it could cause damage to the door or pose a safety hazard. Regularly check and readjust as needed, especially after any door or hardware changes.
Understanding Error Codes (Blinking Lights)
The Chamberlain Whisper Drive Plus utilizes a blinking light system to communicate diagnostic information. These error codes, displayed through the opener’s lights, help pinpoint potential issues. For example, a specific pattern – 1 blink up, 4 blinks down – indicates obstructed or misaligned safety sensors, triggering the auto-reverse function.
Consult the detailed error code chart within this manual for a comprehensive list. Each code corresponds to a specific problem, ranging from sensor issues to motor malfunctions. Understanding these codes empowers you to efficiently troubleshoot and resolve common problems independently.
Remember to always disconnect power before attempting any repairs. If you are uncomfortable interpreting the codes or performing repairs, contact a qualified technician. Ignoring error codes can lead to further damage or compromise the safety of the garage door system.
Vacation Mode Activation
The Chamberlain Whisper Drive Plus features a convenient Vacation Mode for enhanced security during extended absences. When activated, this mode disables the standard remote control and wall button operation, preventing unauthorized access to your garage. The door can still be operated using the keypad (if installed) or through Smart Home integration, if enabled.
To activate Vacation Mode, locate the designated button on the garage door opener unit. Press and hold this button for the specified duration (refer to the unit’s labeling). A visual or audible confirmation will indicate successful activation.
Remember to deactivate Vacation Mode upon your return to restore normal operation. This ensures convenient access for yourself and authorized users. Prior to leaving, test the system to confirm proper functionality and security.
Smart Home Integration Options
The Chamberlain Whisper Drive Plus offers seamless integration with various smart home ecosystems, enhancing convenience and control over your garage door. Compatibility includes popular platforms like Aladdin Connect, offering smartphone control, real-time notifications, and remote access from anywhere with an internet connection.
Integration typically involves connecting the garage door opener to your home’s Wi-Fi network, often through a compatible hub or bridge. Follow the specific instructions provided by your chosen smart home platform for a streamlined setup process.
Once connected, you can monitor door status, receive alerts for activity, and even grant temporary access to guests. Explore the features of your smart home system to customize your experience and maximize the benefits of a connected garage door.